2020. 10. 9. 03:17ㆍ0x0A Develop/WINDOWS SERVER
Windows Server
The Windows Server has two types.
one is Server Core. Another is Desktop Experience (GUI).
I choose the server core.
Windows 2019 Server Core does not have a Desktop GUI, so you need to navigate using command-line tools.
Let me talk about why I decided on the server core.
The Server Core's strength is less vulnerabilities, lower consumption CPU, RAM and disk space, less resource also.
The server core's weakness.
If I finish any update and reboot, the server asks for a password again.
and I am not sure that this option is strength or weakness.
Server core makes it easy to turn off Windows Update, simply by setting the update to manual via sconfig.
Server Core is not as “pretty”. It is not user-friendly and not meant to be managed locally but rather from remote, via proprietary remote management solutions.
Server Core does not support many apps, regardless. You’d probably not want to run any GUI applications on a server. In the case of Server Core, you couldn’t even if you wanted. However, you may wish to run Hyper-V manager locally, which Server Core won’t let you just as well.
Noted : My Client Environment is windows 10 HOME therefore, I can not use Hyper-V.
From now on, Let's go to the Windows Server Core Journey.
|1| sconfig
The sconfig is the controller.
With sconfig, you use the numbered menu to configure the most important server properties, including:
* Domain / Workgroup
* Hostname / Computer Name
* Add Credential (Administrators)
* Time, time zone, and date
* Domain membership
* IP addressing
* Remote access
* Windows Update Toggle Key
* Log off / Turn off
|2| Remote Access through Powershell
https://docs.microsoft.com/en-us/powershell/module/microsoft.powershell.core/enable-psremoting
"Enable-PSRemoting -SkipNetworkProfileCheck -Force"
|3| Install Powershell Core
This is a concept that has nothing to do with Server, but with the Client
On your Windows 10 administrative workstation, open up an administrative PowerShell console and run the following command to ensure we can perform remote management of our Windows 2019 Server Core
If the command below fails, proceed from 'winrm quickconfig' first
"Set-Item -Path WSMan:\localhost\Client\TrustedHosts -Value * -Force"
Download the latest x64 PowerShell Core release from Microsoft's GitHub releases page('https://github.com/PowerShell/PowerShell/releases/tag/v7.1.0-rc.1'). Next, let's define a persistent PowerShell remoting session with the Server Core box (substituting your own server's IPv4 address) and copy the .msi to the root of its drive C:
I downloaded https://github.com/PowerShell/PowerShell/releases/download/v7.1.0-rc.1/PowerShell-7.1.0-rc.1-win-x64.msi.
I tried this command line.
"$session = New-PSSession -ComputerName 192.168.40.128 -Credential (Get-Credential)"
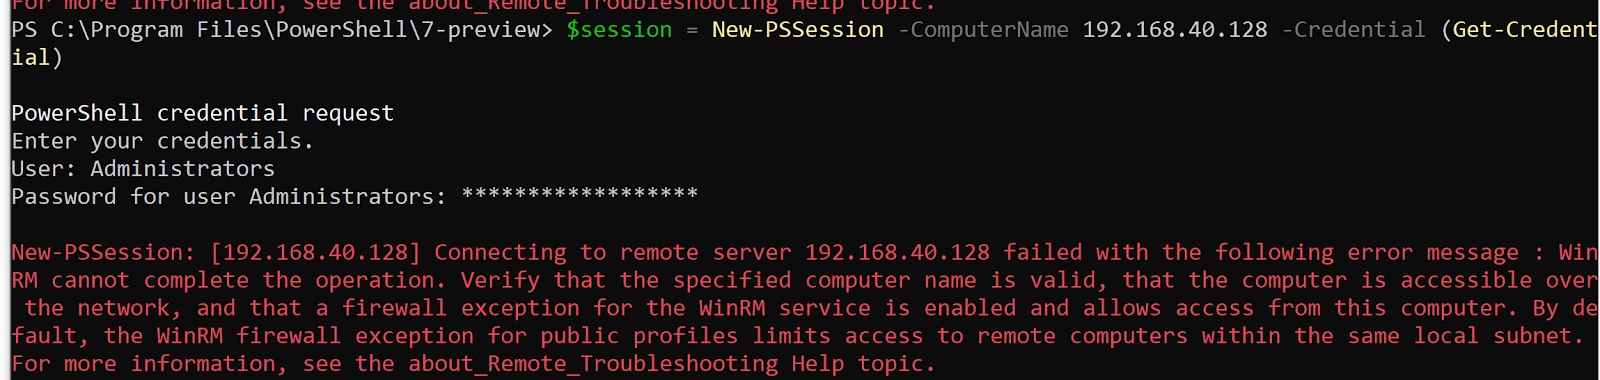
Sadly, this command line did not work.
because currently, server IP range and client IP range is different.
Therefore, I decided that the server IP subnet change.
The command line is below.
PS C:\Users\Administrator> New-NetFirewallRule `
>> -Name 'ICMPv4' `
>> -DisplayName 'ICMPv4' `
>> -Description 'Allow ICMPv4' `
>> -Profile Any `
>> -Direction Inbound `
>> -Action Allow `
>> -Protocol ICMPv4 `
>> -Program Any `
>> -LocalAddress Any `
>> -RemoteAddress Any
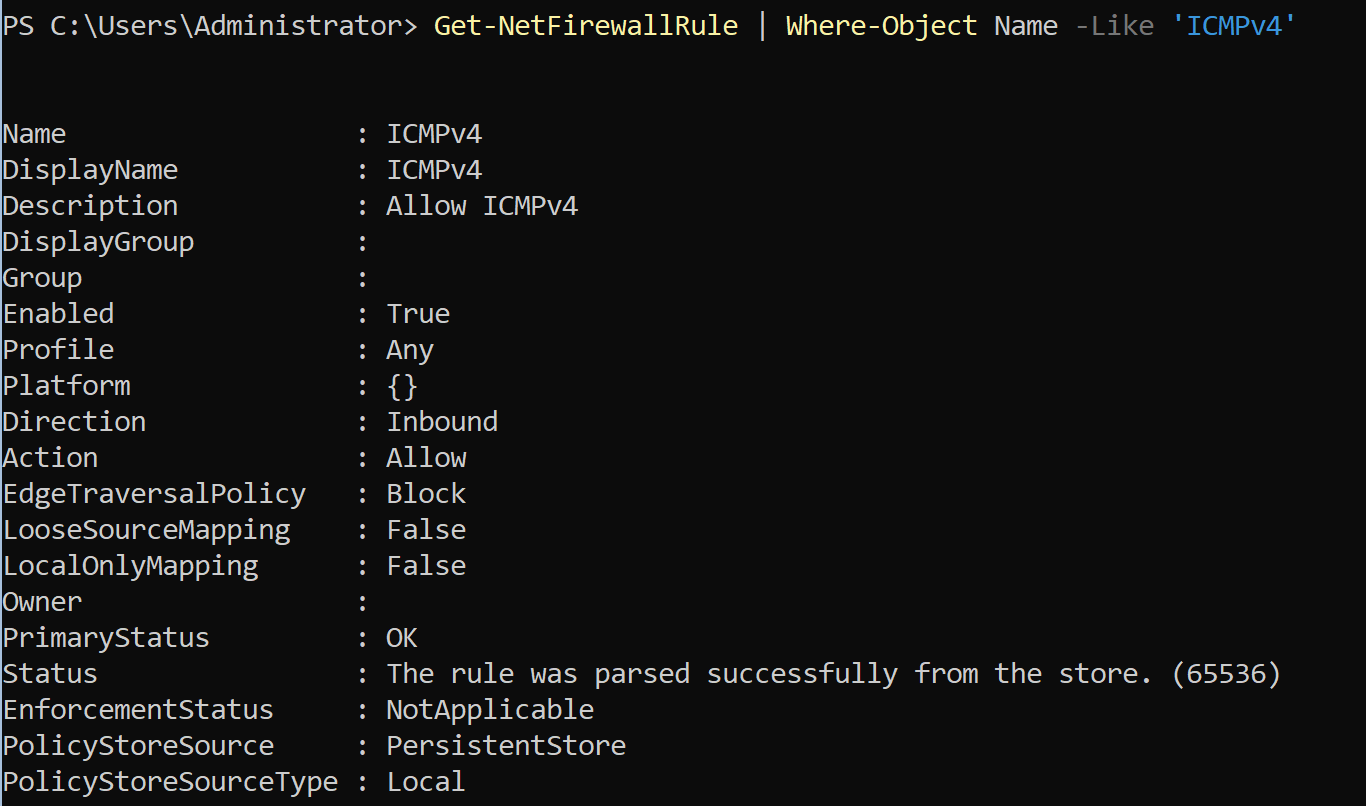
However, still not ping.
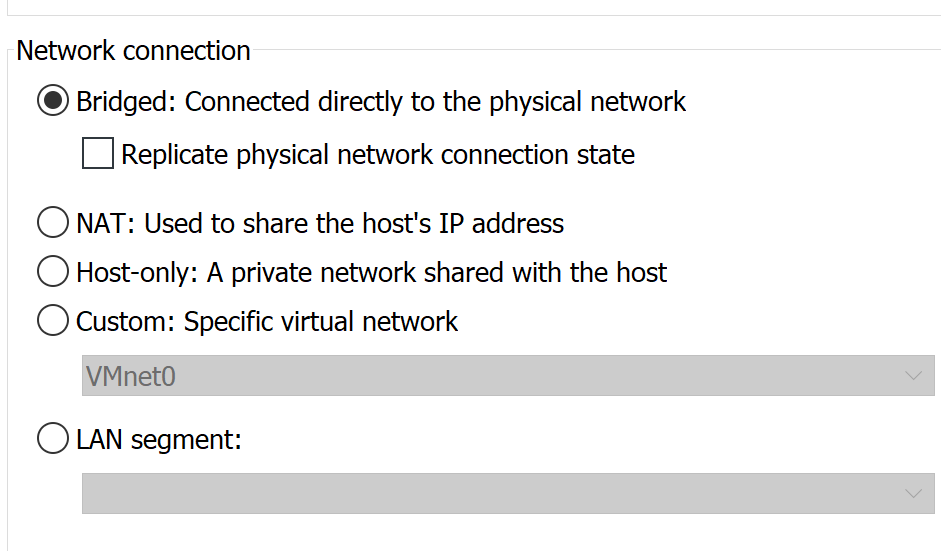
If you change NAT to Bridge, network communication is smooth.
Next setting is Domain.
Step 1)
sconfig -> 2 -> DC001

Step 2)
sconfig -> 8 -> 1 -> 2 -> domain IP (same IP in server)
Step 3)
Powershell -> Install-WindowsFeature -Name ad-domain-services -IncludeManagementTools
Step 4)
Powershell -> Import-Module ADDSDeployment
Step 5)
Powershell -> Install-ADDSForest
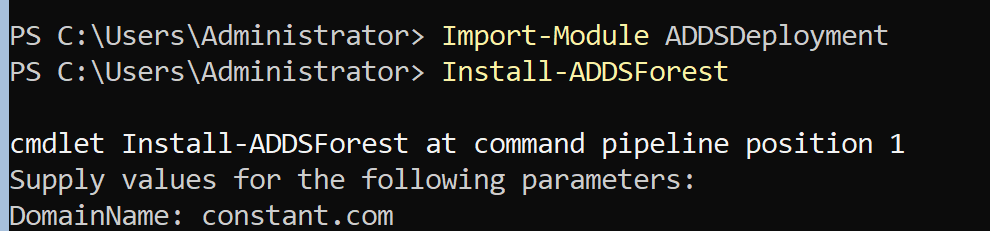
After the following tasks are completed, the domain controller setting is completed.
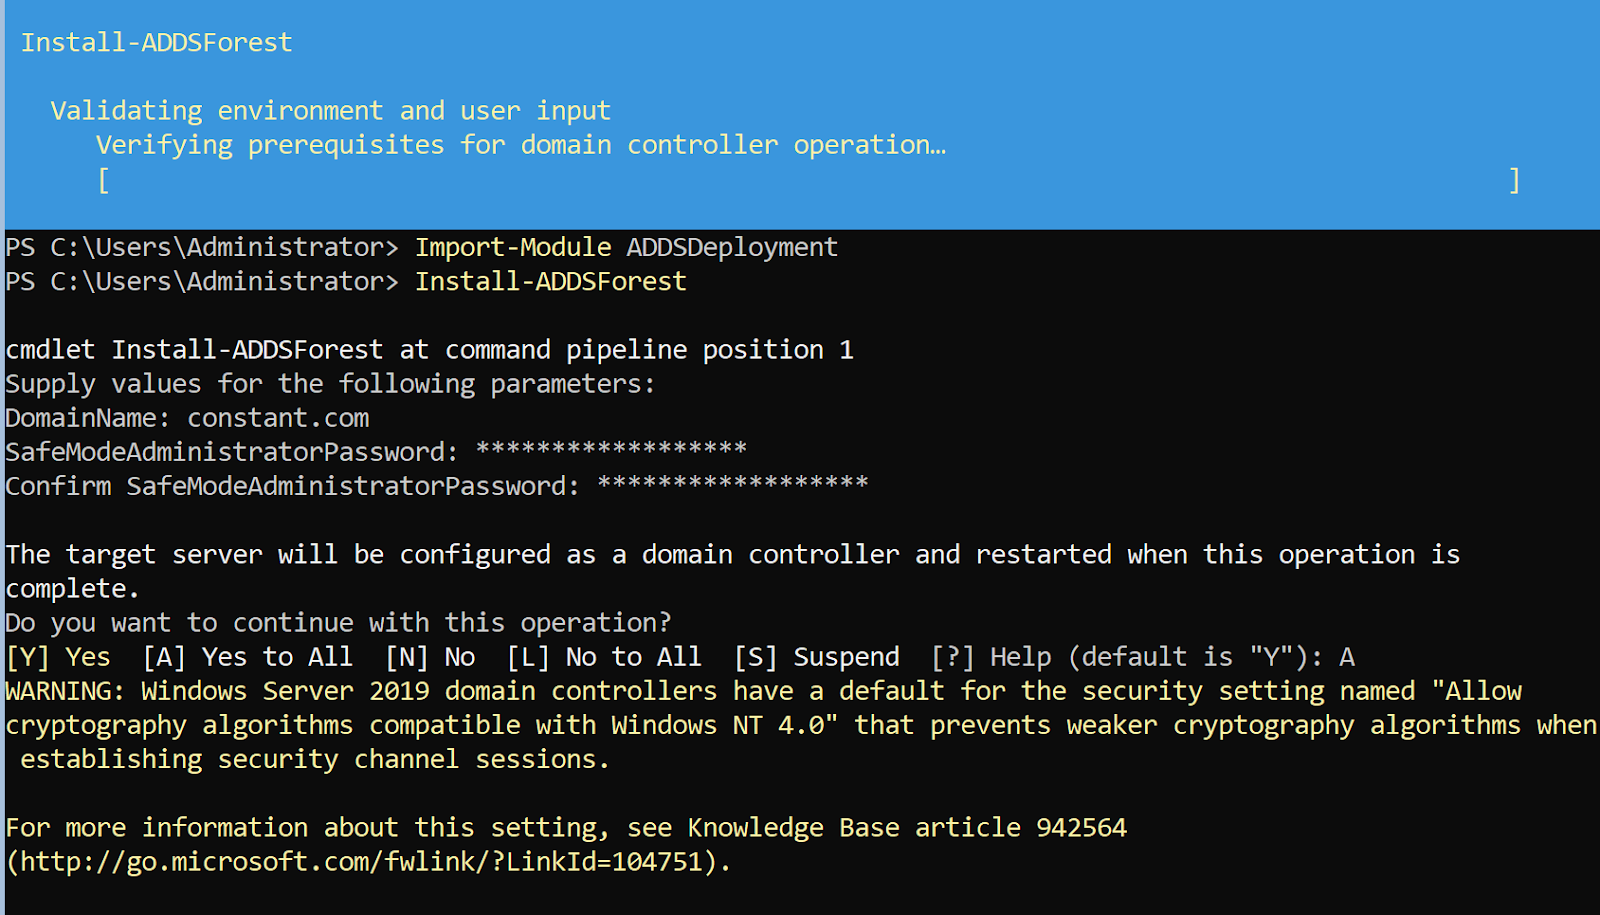
It may take longer than expected. Rest assured that it is not an error.

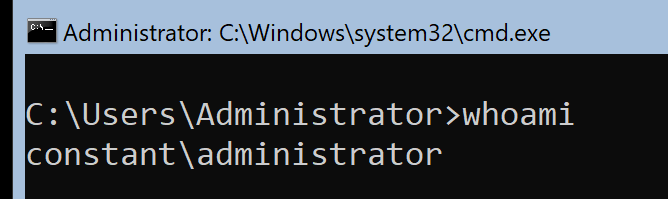
The picture below can prove that the domain controller registration was successful.
Before domain controller registration, an administrator simply appears.
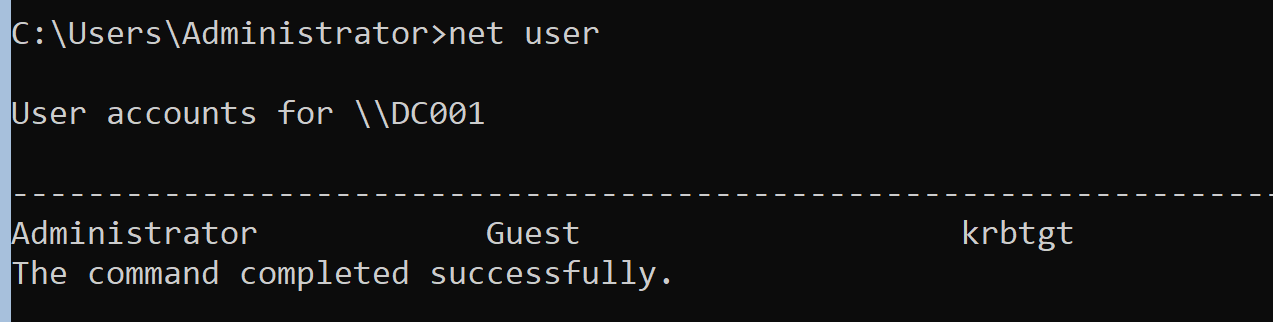
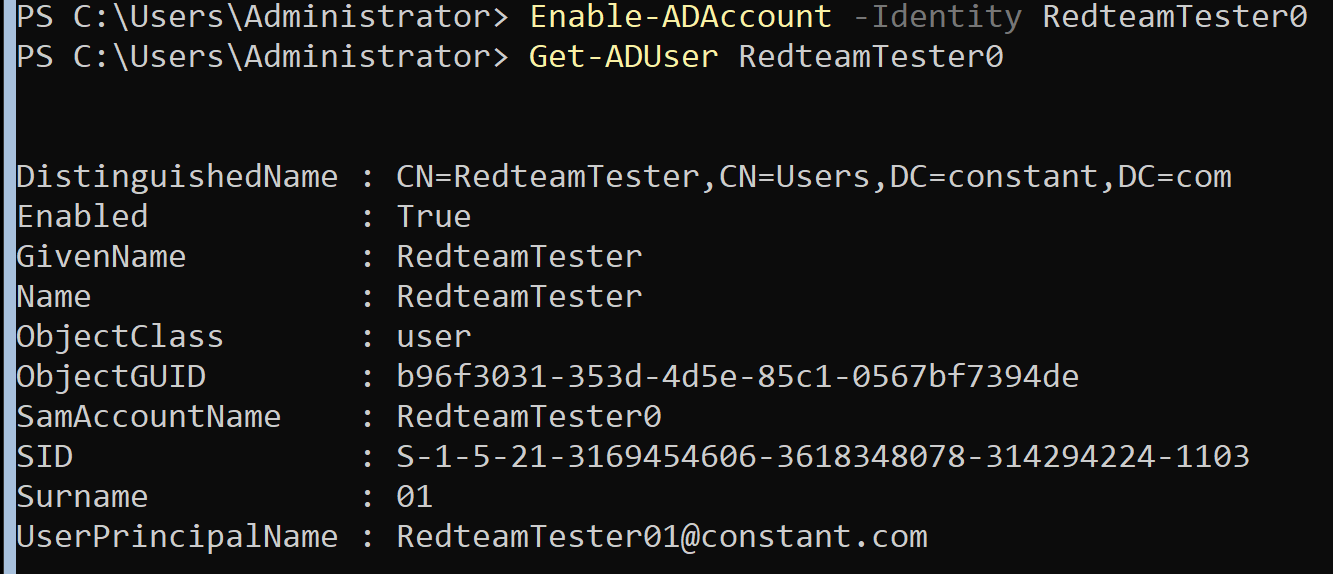
Next, create an account to replace the administrator.

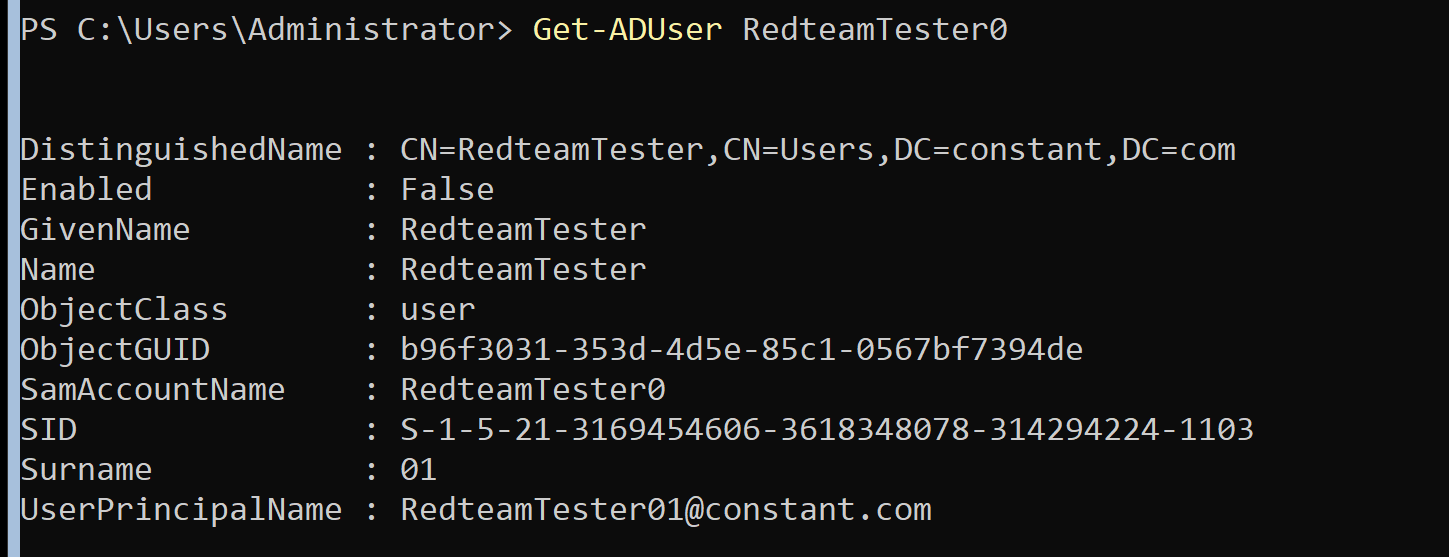
As you can see in the photo below, SamAccountName is the real account.
In Linux, change the password with passwd, but in Windows Server, use the following method.

'0x0A Develop > WINDOWS SERVER' 카테고리의 다른 글
| Windows 2019 Server Core #2 Change from general account to domain account. (0) | 2020.10.09 |
|---|